
Update Rows
The Update Rows action updates one or more existing rows in a sheet in Smartsheet. Updates can be performed on cell values, position in the sheet, or hierarchy.
When to use this
Any time a flow needs to change values or aspects of rows that already exist.
Need this action in your flow?
Get this action plus 6 others and ready-to-use sample flows with the toolkit.
Parameters
| Parameter | Required | Description |
|---|---|---|
sheetId | Required | The ID of the sheet containing the rows to update. |
allowPartialSuccess | Optional | Lets some rows succeed even if others in the same update fail. |
overrideValidation | Optional | Allows values outside a column’s validation limits. Requires strict set to false on the relevant cell. |
accessApiLevel | Optional | Set to 1 to allow COMMENTER access. Defaults to VIEWER access. |
Using sheetId
This can be a fixed, hardcoded value taken from the properties of a sheet in Smartsheet, but it is very common to get the sheetId dynamically from a trigger or another action.
Using allowPartialSuccess
Set to true to prevent the entire batch of rows being updated from failing if there are 1 or more rows that are rejected.
Using overrideValidation
Relevant if a column has dropdown or validation rules and you deliberately want to write a value outside them.
Using accessApiLevel
Not commonly used if you’re running the flow on sheets you own or administer. Smartsheet added Commenter as a distinct access level after the API already existed, so by default it’s quietly treated as Viewer for backward compatibility. Setting this to 1 tells the API to recognize Commenter properly, which is relevant if your API token’s access to this sheet is specifically at the Commenter level.
Updating rows
The Body field accepts rows two different ways, and you can switch between them using the icon in the top-right corner of the field.
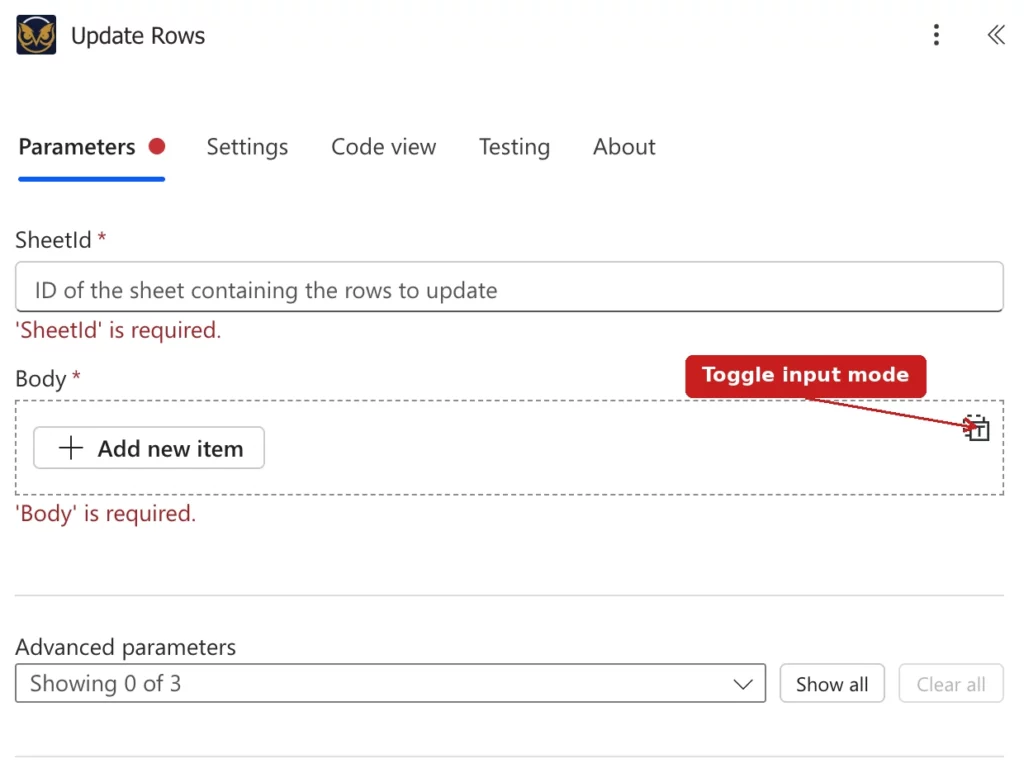
Updating rows with detail inputs
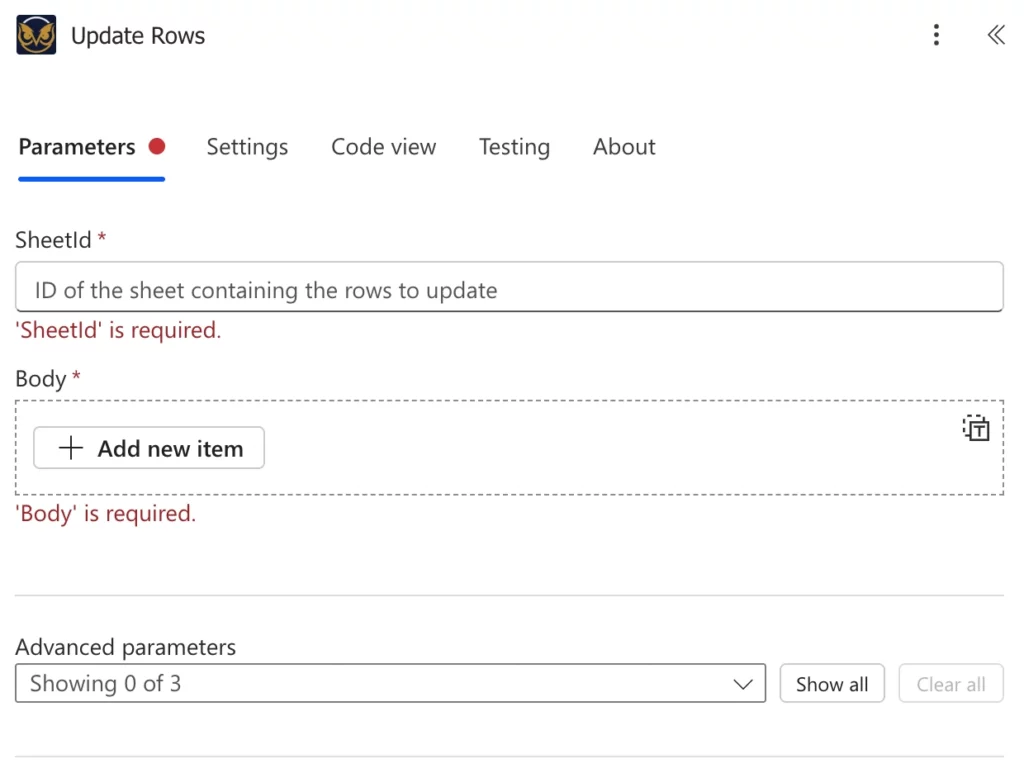
The default view. Click Add new item to add each row as its own set of fields, filled in through the picker UI. Straightforward for a known, fixed number of rows, but every row has to be added by hand, so it doesn’t work when the row count varies at runtime.
Updating rows as a raw array
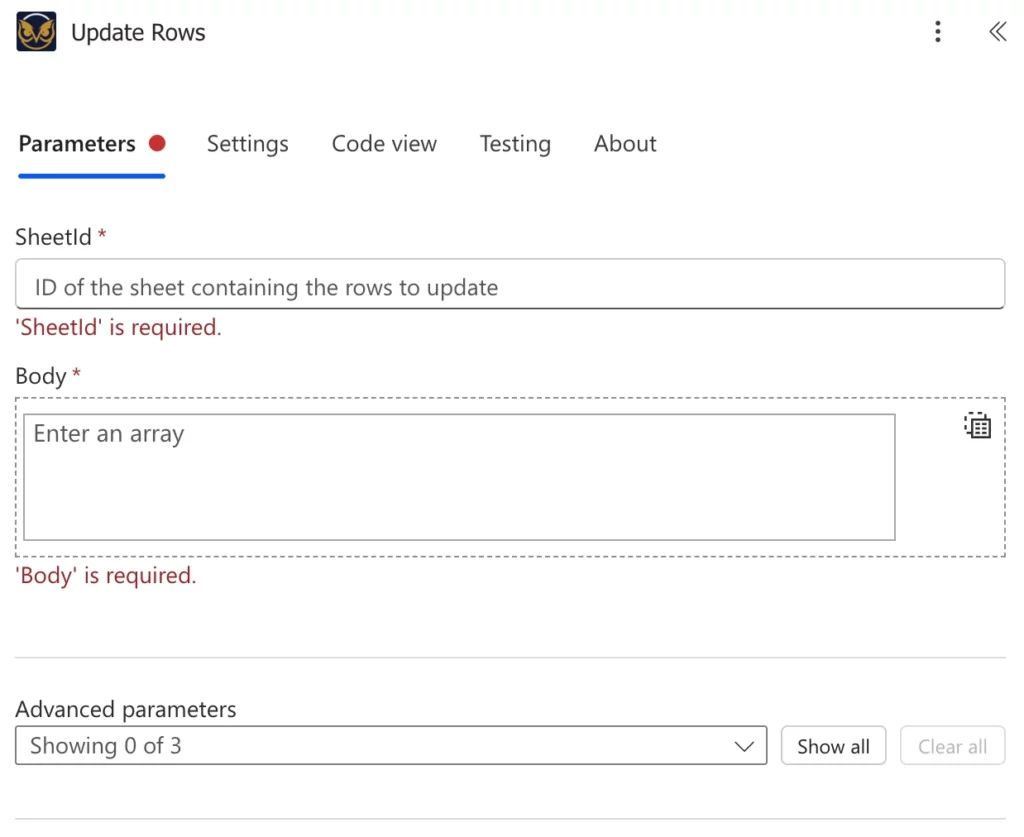
Clicking the icon in the top-right of the Body field in the default view details array view, results in the view shown above. The item picker is replaced with a single field that accepts a JSON array, which means the array can come from an expression or the output of any earlier step. Using this option, the number of rows doesn’t have to be known when you build the flow. This is how you update a dynamic number of rows, anywhere from 1 up to the 500-row limit, without adding items by hand.
This input accepts a standard Smartsheet row object or array of row objects, but each object in the array requires an id so Smartsheet knows which existing row to update. Here is an example showing updating 2 rows with a value in 1 cell:
[
  {
    "id": 2345678901234567,
    "cells": [
      { "columnId": 1234567890123456, "value": "Updated task" }
    ]
  },
  {
    "id": 3456789012345678,
    "cells": [
      { "columnId": 1234567890123456, "value": "Another updated task" }
    ]
  }
]
Row fields
Each row you add is its own item with these fields. You can update multiple rows in one execution of the action, up to 500 rows, which is a hard limit set by the Smartsheet API itself, not something this connector can increase.
| Field | Required | Description |
|---|---|---|
id | Required | The ID of the row to update. |
cells | Optional | The values to change on the row. See below. |
locationType | Optional | Where to move the row. See below. |
locationReferenceRowId | Situational | Required for some locationType options. See below. |
expanded | Optional | Whether the row is expanded or collapsed. |
format | Optional | Baseline formatting for the row’s blank cells only. |
locked | Optional | Whether the row is locked. |
Using id
This is the unique row ID belonging to an existing row. This is almost always assigned dynamically from a trigger or previous action rather than being hardcoded.
Using cells
Only include the cells you actually want to change. You don’t need to resend every cell on the row. Each cell needs a columnId and a value. A few things worth knowing:
displayValueonly matters for contact-list columns, where it sets the displayed name. Put the contact’s email invalueand their name indisplayValue.formulalets you set the cell to a formula (like=SUM(CHILDREN())) instead of a static value. Cannot be combined withvalue,displayValue, orlinkTypeon the same cell.strictset to false bypasses Smartsheet’s normal value type checking. This is also the fix for date columns since Smartsheet’s DATE columns only acceptYYYY-MM-DDby default and reject regional formats like07/30/2026. If you setstrictto false on that cell, then you can enter a date value like “07/30/2026”.linkTypeturns the cell into a hyperlink, or removes an existing one. Choose URL, Sheet, Report, or Dashboard to set a new link (provide the target inlinkValue, and setvalueto the link’s label text), or choose Clear to remove a hyperlink that’s already on the cell. Leave blank to leave any existing hyperlink untouched.linkValueis the link’s target: the full URL for a URL link, or the sheet/report/dashboard ID for the others. Required alongsidelinkTypeunlesslinkTypeis Clear.- For checkbox columns, set
valuetotruefor checked, orfalse(or leave it blank) for unchecked.
Using locationType
Smartsheet’s raw API uses seven separate placement fields that can only be combined in specific ways. This connector replaces all of them with one dropdown:
| locationType | Needs locationReferenceRowId? | Moves the row |
|---|---|---|
Top | No | To the very top of the sheet. |
Bottom | No | To the very bottom of the sheet. |
Child (first) | Yes | To become the first child of the row in locationReferenceRowId. |
Child (last) | Yes | To become the last child of the row in locationReferenceRowId. |
Sibling (below) | Yes | Directly below the row in locationReferenceRowId, at the same level. |
Sibling (above) | Yes | Directly above the row in locationReferenceRowId, at the same level. |
Indent under row above | No | Makes the row a child of whichever row is directly above it. |
Outdent one level | No | Moves the row out one level from its current position. |
NOTE: Every row in the same call must use the same locationType. You can’t send one row with Sibling (below) and another with Child (last) in the same call. Smartsheet will reject the entire request if the types don’t match.
Using locationReferenceRowId
Pairs with: required when locationType is set to Child (first), Child (last), Sibling (below), or Sibling (above) — see the table above.
The ID of the row that the updated row is positioned relative to. For instance, the parent for Child (first) and Child (last), or the sibling for Sibling (above) and Sibling (below). Leave blank for Top, Bottom, Indent under row above, and Outdent one level, which don’t need a reference row.
NOTE: Every row in the same call must use the same locationReferenceRowId. To insert rows under or beside different reference rows, use a separate call for each one.
Using expanded
This controls whether the row displays expanded or collapsed if it has child rows.
Using format
Sets the baseline format ONLY for the row’s blank cells. It does not restyle cells that already have a value. To format existing data, format has to be set per-cell, not on the row.
Using locked
Sets whether the row is locked from further editing.
Example
A flow that marks a task row complete and moves it into a “Done” section of the sheet in the same call, which requires updating a Status cell and setting locationType to move it under the right parent row.
What you get back
The updated row objects, reflecting the new cell values and position.
Gotchas
Every row in a single call must share the same locationType and the same locationReferenceRowId. You can’t move some rows to one sibling/parent and other rows to a different one in the same call. Attempting to mix either the type or the reference row fails the entire call. If rows need to move to different reference points, split them across separate Update Rows calls with one call per distinct location.
If you’re only moving a row with locationType and not changing any cell values, ensure there are no items added under cells. If you add an empty cell item in Power Automate, Smartsheet’s API will reject the empty cell object. If you hit an error about a missing cell value on a row where you didn’t mean to set any cells, delete the empty cell item (in the item picker UI) or empty object (represented by {} in the raw array input).
There’s no locationType option for “make this row a sibling, then indent it.” That combination requires two separate Update Rows actions. One to reposition it as a sibling, then a follow-up to indent it.
A cell’s formula and its value/displayValue/linkType fields are mutually exclusive. If formula is set on a cell, none of those other fields can also be set on that same cell. Smartsheet’s API rejects the entire call if they are. If a cell should be formula-driven, leave its value and link fields empty.
Date and Contact List columns are common sources of erros. See the strict and displayValue notes above to help you work through issues you may encounter.
Need this action in your flow?
Get this action plus 6 others and ready-to-use sample flows with the toolkit.